
How to Build a Patio
A complete guide to laying paving slabs for your garden
Save 50%+ on Labour
Professional patio installation costs £40-80 per m² for labour alone. A 20m² patio could save you £800-1600 by doing it yourself.
Add Value to Your Home
A well-built patio can add 5-10% to your property value and creates usable outdoor living space for entertaining and relaxation.
Weekend Project
A small to medium patio (up to 20m²) can be completed over a weekend with proper preparation. Larger patios may take 2-3 weekends.
Calculate Your Materials
Use our aggregate calculator to work out exactly how much sub-base, sand, and cement you need.
Why Build Your Own Patio?
A patio transforms your garden into an outdoor living space, perfect for summer BBQs, morning coffees, or simply relaxing in the sunshine. While professional installation is common, building your own patio is a rewarding weekend project that can save you significant money.
The key to a long-lasting patio is proper preparation. Most patio failures (sinking, cracking, weeds) come from inadequate sub-base preparation. Get this right, and your patio will last decades with minimal maintenance.
Cost Comparison: DIY vs Professional
| Item | DIY | Contractor |
|---|---|---|
| Patio slabs (per m²) | £15-40 | £15-40 |
| MOT Type 1 sub-base (per m²) | £5-8 | £5-8 |
| Sharp sand (per m²) | £2-4 | £2-4 |
| Cement (per m²) | £2-3 | £2-3 |
| Labour (per m²) | £0 | £40-80 |
| Total for 20m² patio | £500-1100 | £1300-2700 |
Step-by-Step Guide
Mark Out and Excavate
Mark out your patio area using string lines and pegs. Remember to allow for a 1:80 fall away from the house (12.5mm per metre).
- Excavate to 150-200mm depth
- Keep finished level 150mm below DPC
- Remove any soft spots and fill with hardcore
Tip: Hire a mini digger for larger areas - it'll save your back and can be rented for around £100-150 per day.
Lay the Sub-Base
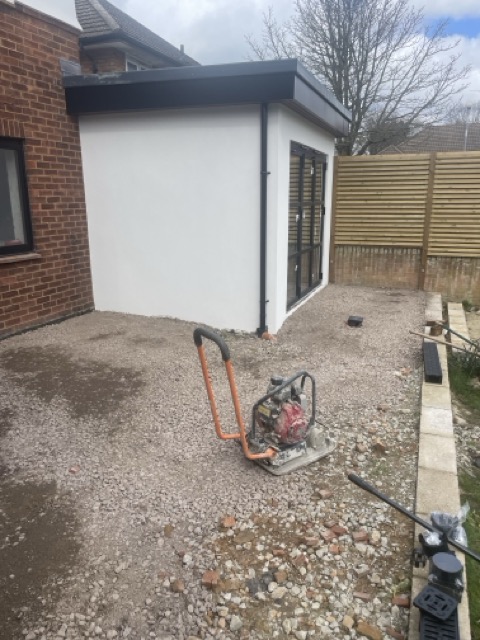
The sub-base is the foundation of your patio. Use MOT Type 1 crushed aggregate for best results.
- Lay weed membrane first (optional but recommended)
- Spread MOT Type 1 to 100mm depth
- Compact with a plate compactor (hire for ~£30/day)
- Check levels maintain the correct fall
Prepare the Mortar Bed
Mix a semi-dry mortar bed using 5 parts sharp sand to 1 part cement. The mix should hold together when squeezed but not be wet or sloppy.
Spread the mortar to approximately 30-40mm depth. Only prepare enough area for a few slabs at a time - the mortar will start to go off after about an hour.
Lay the Paving Slabs
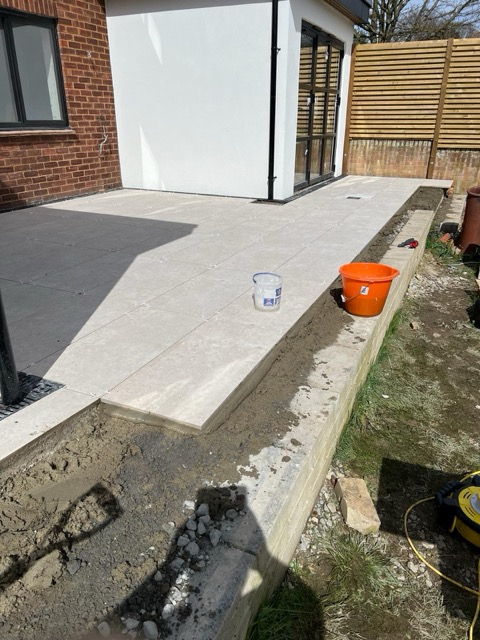
Start from a fixed edge (usually the house wall) and work outwards. Use spacers to maintain consistent 10-15mm joints.
- Prime the back of each slab with cement slurry before laying
- Lay onto a full mortar bed for complete support
- Tap down with rubber mallet to set level
- Check level across multiple slabs regularly
- Use a long spirit level to check the fall
Point the Joints
Wait 24-48 hours for the slabs to set before pointing. Use a 3:1 sharp sand to cement mix, slightly wetter than the bedding mortar.
Polymeric sand: Easier for DIYers - simply brush it in dry and activate with water. It hardens to prevent weeds and ant infestations.
Grout for porcelain: If using rectified (precision-cut) porcelain pavers with tight 3-5mm joints, you can use exterior tile grout instead of mortar. This gives a cleaner, more contemporary finish. Use a flexible, frost-proof grout designed for external use.
Clean any mortar or grout splashes from slab surfaces immediately with a damp sponge. Once dried, cement stains are very difficult to remove.
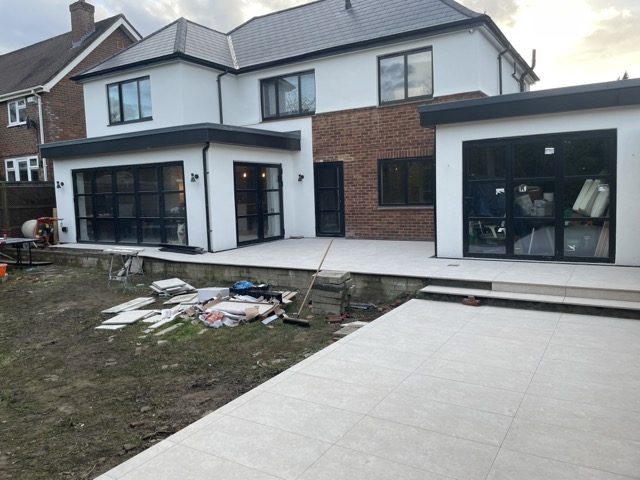
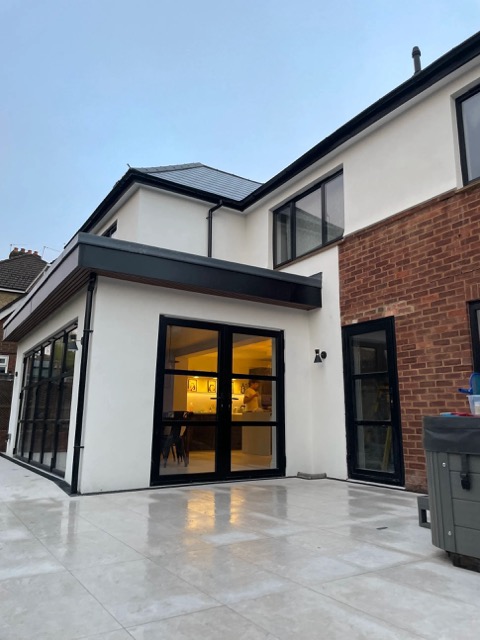
The Finished Result
Your finished patio should be level, with consistent joints and a slight fall away from the house. Avoid walking on it for at least 24 hours to let the mortar fully cure.
For best results, wait a week before placing heavy furniture or planters. Consider applying a patio sealer to protect against stains and make cleaning easier.
A properly built patio should last 20-30 years with minimal maintenance. Simply pressure wash annually and re-point any joints that crack over time.
Types of Paving Slabs
Concrete Slabs
Most affordable option (£15-25/m²). Available in many colours and textures. Modern pressed concrete can look very similar to natural stone.
Natural Stone
Premium look with unique variations (£40-100/m²). Indian sandstone is popular for UK patios. Requires sealing to prevent staining.
Porcelain Pavers
Modern, low-maintenance option (£35-60/m²). Extremely durable, frost-proof, and stain-resistant. The non-porous back requires priming with a cement slurry (yoghurt-consistency mix of cement and water, or use a proprietary porcelain primer) before laying to ensure proper adhesion.
Block Pavers
Interlocking pavers laid on sand (£25-40/m²). Great for driveways as they flex with ground movement. Can be lifted and relaid if needed.
Frequently Asked Questions
A DIY patio typically costs £30-60 per square metre for materials (slabs, sand, cement, sub-base). Professional installation adds £40-80 per m² for labour. A 20m² patio might cost £600-1200 DIY vs £1400-2800 professionally installed.
MOT Type 1 crusite aggregates is the industry standard for patio sub-bases. It compacts well and provides excellent drainage. Use a minimum 100mm depth for foot traffic, or 150mm if you plan to drive vehicles over it.
Generally no, patios are permitted development. However, you need permission if the patio is at the front of the house, raises ground level by more than 300mm, or covers more than 50% of your garden. Always check with your local council.
For most domestic patios, a wet mortar bed (5:1 sharp sand to cement mix) is recommended. It provides a stronger, more permanent bond than dry sand and prevents slabs from rocking. Pure sand beds are only suitable for flexible paving like block pavers.
Use polymeric jointing sand (brush-in sand that hardens when wet) or point the joints with a 3:1 mortar mix. Ensure your sub-base has weed membrane underneath. For existing patios, a patio sealer can help prevent weed growth.
A patio should slope away from the house at a minimum gradient of 1:80 (12.5mm per metre). This means a 4m deep patio should be at least 50mm lower at the far edge than at the house wall.
Materials You'll Need
- Paving slabs
Calculate area + 5% for cuts
- MOT Type 1 sub-base
100mm depth = ~0.1 tonnes/m²
- Sharp sand
For mortar bed - ~0.05 tonnes/m²
- Cement
25kg bags - 1 bag per 2-3m²
- Weed membrane
Optional but recommended
Tools Required
- Spade and shovel
- Wheelbarrow
- String line and pegs
- Spirit level (long)
- Rubber mallet
- Plate compactor (hire)
- Pointing trowel
- Angle grinder for cuts (optional)
Top Tips
- Order extra slabs
Order 5-10% extra to account for cuts and potential breakages during laying.
- Mix slabs from different packs
Natural stone and some concrete slabs can vary in colour between packs.
- Check the weather
Avoid laying slabs in rain or frost. Ideal temperature is 5-25°C.
- Plan your cuts
Lay out slabs dry first to minimise cuts and check the pattern looks right.